Learn ReactJS Tutorial

ReactJS tutorial provides basic and advanced concepts of ReactJS. Currently, ReactJS is one of the most popular JavaScript front-end libraries which has a strong foundation and a large community.
ReactJS is a declarative, efficient, and flexible JavaScript library for building reusable UI components. It is an open-source, component-based front end library which is responsible only for the view layer of the application. It was initially developed and maintained by Facebook and later used in its products like WhatsApp & Instagram.
Our ReactJS tutorial includes all the topics which help to learn ReactJS. These are ReactJS Introduction, ReactJS Features, ReactJS Installation, Pros and Cons of ReactJS, ReactJS JSX, ReactJS Components, ReactJS State, ReactJS Props, ReactJS Forms, ReactJS Events, ReactJS Animation and many more.
Why we use ReactJS?
The main objective of ReactJS is to develop User Interfaces (UI) that improves the speed of the apps. It uses virtual DOM (JavaScript object), which improves the performance of the app. The JavaScript virtual DOM is faster than the regular DOM. We can use ReactJS on the client and server-side as well as with other frameworks. It uses component and data patterns that improve readability and helps to maintain larger apps.
ReactJS Tutorial Index
Prerequisite
Before learning ReactJS in-depth, you must have a good knowledge of JavaScript, HTML5, and CSS. The knowledge of ECMAScript 2015 syntax can also be helpful.
Audience
We have developed this ReactJS tutorial for beginners and professionals both. We will try to introduce every concept with simple code examples that you can be easily understood. After completing all the sections, you can work confidently with ReactJS.
Problems
We assure you that you will not find any problem in our ReactJS tutorial. But, if you find any mistake, you can post it in our comment section.
React Introduction
ReactJS is a declarative, efficient, and flexible JavaScript library for building reusable UI components. It is an open-source, component-based front end library responsible only for the view layer of the application. It was created by Jordan Walke, who was a software engineer at Facebook. It was initially developed and maintained by Facebook and was later used in its products like WhatsApp & Instagram. Facebook developed ReactJS in 2011 in its newsfeed section, but it was released to the public in the month of May 2013.
Today, most of the websites are built using MVC (model view controller) architecture. In MVC architecture, React is the 'V' which stands for view, whereas the architecture is provided by the Redux or Flux.
A ReactJS application is made up of multiple components, each component responsible for outputting a small, reusable piece of HTML code. The components are the heart of all React applications. These Components can be nested with other components to allow complex applications to be built of simple building blocks. ReactJS uses virtual DOM based mechanism to fill data in HTML DOM. The virtual DOM works fast as it only changes individual DOM elements instead of reloading complete DOM every time.
To create React app, we write React components that correspond to various elements. We organize these components inside higher level components which define the application structure. For example, we take a form that consists of many elements like input fields, labels, or buttons. We can write each element of the form as React components, and then we combine it into a higher-level component, i.e., the form component itself. The form components would specify the structure of the form along with elements inside of it.
Why learn ReactJS?
Today, many JavaScript frameworks are available in the market(like angular, node), but still, React came into the market and gained popularity amongst them. The previous frameworks follow the traditional data flow structure, which uses the DOM (Document Object Model). DOM is an object which is created by the browser each time a web page is loaded. It dynamically adds or removes the data at the back end and when any modifications were done, then each time a new DOM is created for the same page. This repeated creation of DOM makes unnecessary memory wastage and reduces the performance of the application.
Therefore, a new technology ReactJS framework invented which remove this drawback. ReactJS allows you to divide your entire application into various components. ReactJS still used the same traditional data flow, but it is not directly operating on the browser's Document Object Model (DOM) immediately; instead, it operates on a virtual DOM. It means rather than manipulating the document in a browser after changes to our data, it resolves changes on a DOM built and run entirely in memory. After the virtual DOM has been updated, React determines what changes made to the actual browser's DOM. The React Virtual DOM exists entirely in memory and is a representation of the web browser's DOM. Due to this, when we write a React component, we did not write directly to the DOM; instead, we are writing virtual components that react will turn into the DOM.
React Version
A complete release history for React is given below. You can also see the full documentation for recent releases on GitHub.
| SN | Version | Release Date | Significant Changes |
|---|---|---|---|
| 1. | 0.3.0 | 29/05/2013 | Initial Public Release |
| 2. | 0.4.0 | 20/07/2013 | Support for comment nodes <div>{/* */}</div>, Improved server-side rendering APIs, Removed React.autoBind, Support for the key prop, Improvements to forms, Fixed bugs. |
| 3. | 0.5.0 | 20/10/2013 | Improve Memory usage, Support for Selection and Composition events, Support for getInitialState and getDefaultProps in mixins, Added React.version and React.isValidClass, Improved compatibility for Windows. |
| 4. | 0.8.0 | 20/12/2013 | Added support for rows & cols, defer & async, loop for <audio> & <video>, autoCorrect attributes. Added onContextMenu events, Upgraded jstransform and esprima-fb tools, Upgraded browserify. |
| 5. | 0.9.0 | 20/02/2014 | Added support for crossOrigin, download and hrefLang, mediaGroup and muted, sandbox, seamless, and srcDoc, scope attributes, Added any, arrayOf, component, oneOfType, renderable, shape to React.PropTypes, Added support for onMouseOver and onMouseOut event, Added support for onLoad and onError on <img> elements. |
| 6. | 0.10.0 | 21-03-2014 | Added support for srcSet and textAnchor attributes, add update function for immutable data, Ensure all void elements don't insert a closing tag. |
| 7. | 0.11.0 | 17/07/2014 | Improved SVG support, Normalized e.view event, Update $apply command, Added support for namespaces, Added new transformWithDetails API, includes pre-built packages under dist/, MyComponent() now returns a descriptor, not an instance. |
| 8. | 0.12.0 | 21/11/2014 | Added new features Spread operator ({...}) introduced to deprecate this.transferPropsTo, Added support for acceptCharset, classID, manifest HTML attributes, React.addons.batchedUpdates added to API, @jsx React.DOM no longer required, Fixed issues with CSS Transitions. |
| 9. | 0.13.0 | 10/03/2015 | Deprecated patterns that warned in 0.12 no longer work, ref resolution order has changed, Removed properties this._pendingState and this._rootNodeID, Support ES6 classes, Added API React.findDOMNode(component), Support for iterators and immutable-js sequences, Added new features React.addons.createFragment, deprecated React.addons.classSet. |
| 10. | 0.14.1 | 29/10/2015 | Added support for srcLang, default, kind attributes, and color attribute, Ensured legacy .props access on DOM nodes, Fixed scryRenderedDOMComponentsWithClass, Added react-dom.js. |
| 11. | 15.0.0 | 07/04/2016 | Initial render now uses document.createElement instead of generating HTML, No more extra <span>s, Improved SVG support, ReactPerf.getLastMeasurements() is opaque, New deprecations introduced with a warning, Fixed multiple small memory leaks, React DOM now supports the cite and profile HTML attributes and cssFloat, gridRow and gridColumn CSS properties. |
| 12. | 15.1.0 | 20/05/2016 | Fix a batching bug, Ensure use of the latest object-assign, Fix regression, Remove use of merge utility, Renamed some modules. |
| 13. | 15.2.0 | 01/07/2016 | Include component stack information, Stop validating props at mount time, Add React.PropTypes.symbol, Add onLoad handling to <link> and onError handling to <source> element, Add isRunning() API, Fix performance regression. |
| 14. | 15.3.0 | 30/07/2016 | Add React.PureComponent, Fix issue with nested server rendering, Add xmlns, xmlnsXlink to support SVG attributes and referrerPolicy to HTML attributes, updates React Perf Add-on, Fixed issue with ref. |
| 15. | 15.3.1 | 19/08/2016 | Improve performance of development builds, Cleanup internal hooks, Upgrade fbjs, Improve startup time of React, Fix memory leak in server rendering, fix React Test Renderer, Change trackedTouchCount invariant into a console.error. |
| 16. | 15.4.0 | 16/11/2016 | React package and browser build no longer includes React DOM, Improved development performance, Fixed occasional test failures, update batchedUpdates API, React Perf, and ReactTestRenderer.create(). |
| 17. | 15.4.1 | 23/11/2016 | Restructure variable assignment, Fixed event handling, Fixed compatibility of browser build with AMD environments. |
| 18. | 15.4.2 | 06/01/2017 | Fixed build issues, Added missing package dependencies, Improved error messages. |
| 19. | 15.5.0 | 07/04/2017 | Added react-dom/test-utils, Removed peerDependencies, Fixed issue with Closure Compiler, Added a deprecation warning for React.createClass and React.PropTypes, Fixed Chrome bug. |
| 20. | 15.5.4 | 11/04/2017 | Fix compatibility with Enzyme by exposing batchedUpdates on shallow renderer, Update version of prop-types, Fix react-addons-create-fragment package to include loose-envify transform. |
| 21. | 15.6.0 | 13/06/2017 | Add support for CSS variables in style attribute and Grid style properties, Fix AMD support for addons depending on react, Remove unnecessary dependency, Add a deprecation warning for React.createClass and React.DOM factory helpers. |
| 22. | 16.0.0 | 26/09/2017 | Improvd error handling with introduction of "error boundaries", React DOM allows passing non-standard attributes, Minor changes to setState behavior, remove react-with-addons.js build, Add React.createClass as create-react-class, React.PropTypes as prop-types, React.DOM as react-dom-factories, changes to the behavior of scheduling and lifecycle methods. |
| 23. | 16.1.0 | 9/11/2017 | Discontinuing Bower Releases, Fix an accidental extra global variable in the UMD builds, Fix onMouseEnter and onMouseLeave firing, Fix <textarea> placeholder, Remove unused code, Add a missing package.json dependency, Add support for React DevTools. |
| 24. | 16.3.0 | 29/03/2018 | Add a new officially supported context API, Add new packagePrevent an infinite loop when attempting to render portals with SSR, Fix an issue with this.state, Fix an IE/Edge issue. |
| 25. | 16.3.1 | 03/04/2018 | Prefix private API, Fix performance regression and error handling bugs in development mode, Add peer dependency, Fix a false positive warning in IE11 when using Fragment. |
| 26. | 16.3.2 | 16/04/2018 | Fix an IE crash, Fix labels in User Timing measurements, Add a UMD build, Improve performance of unstable_observedBits API with nesting. |
| 27. | 16.4.0 | 24/05/2018 | Add support for Pointer Events specification, Add the ability to specify propTypes, Fix reading context, Fix the getDerivedStateFromProps() support, Fix a testInstance.parent crash, Add React.unstable_Profiler component for measuring performance, Change internal event names. |
| 28. | 16.5.0 | 05/09/2018 | Add support for React DevTools Profiler, Handle errors in more edge cases gracefully, Add react-dom/profiling, Add onAuxClick event for browsers, Add movementX and movementY fields to mouse events, Add tangentialPressure and twist fields to pointer event. |
| 29. | 16.6.0 | 23/10/2018 | Add support for contextType, Support priority levels, continuations, and wrapped callbacks, Improve the fallback mechanism, Fix gray overlay on iOS Safari, Add React.lazy() for code splitting components. |
| 30. | 16.7.0 | 20/12/2018 | Fix performance of React.lazy for lazily-loaded components, Clear fields on unmount to avoid memory leaks, Fix bug with SSR, Fix a performance regression. |
| 31. | 16.8.0 | 06/02/2019 | Add Hooks, Add ReactTestRenderer.act() and ReactTestUtils.act() for batching updates, Support synchronous thenables passed to React.lazy(), Improve useReducer Hook lazy initialization API. |
| 32. | 16.8.6 | 27/03/2019 | Fix an incorrect bailout in useReducer(), Fix iframe warnings in Safari DevTools, Warn if contextType is set to Context.Consumer instead of Context, Warn if contextType is set to invalid values. |
React Environment Setup
In this section, we will learn how to set up an environment for the successful development of ReactJS application.
Pre-requisite for ReactJS
- NodeJS and NPM
- React and React DOM
- Webpack
- Babel
Ways to install ReactJS
There are two ways to set up an environment for successful ReactJS application. They are given below.
- Using the npm command
- Using the create-react-app command
1. Using the npm command
Install NodeJS and NPM
NodeJS and NPM are the platforms need to develop any ReactJS application. You can install NodeJS and NPM package manager by the link given below.
https://www.javatpoint.com/install-nodejs-on-linux-ubuntu-centos
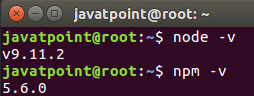
To verify NodeJS and NPM, use the command shown in the below image.
Install React and React DOM
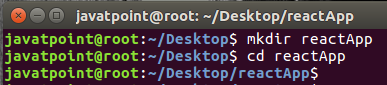
Create a root folder with the name reactApp on the desktop or where you want. Here, we create it on the desktop. You can create the folder directly or using the command given below.
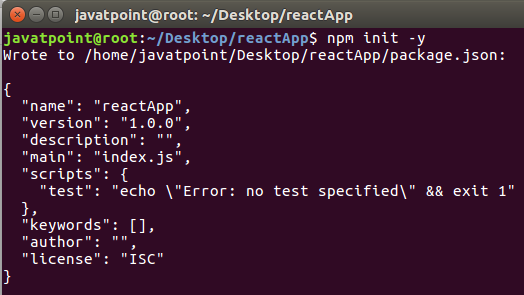
Now, you need to create a package.json file. To create any module, it is required to generate a package.json file in the project folder. To do this, you need to run the following command as shown in the below image.
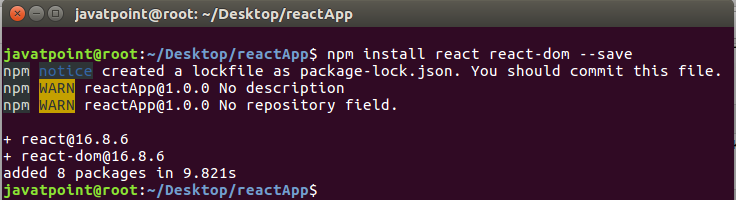
After creating a package.json file, you need to install react and its DOM packages using the following npm command in the terminal window as shown in the below image.
You can also use the above command separately which can be shown as below.
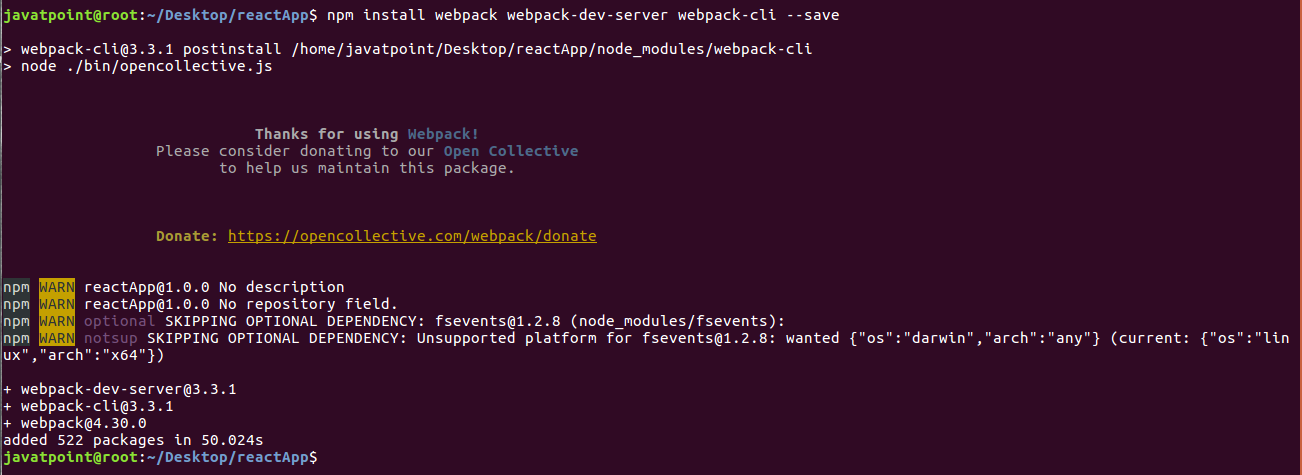
Install Webpack
Webpack is used for module packaging, development, and production pipeline automation. We will use webpack-dev-server during development, webpack to create production builds, and webpack CLI provides a set of commands. Webpack compiles these into a single file(bundle). To install webpack use the command shown in the below image.
You can also use the above command separately which can be shown as below.
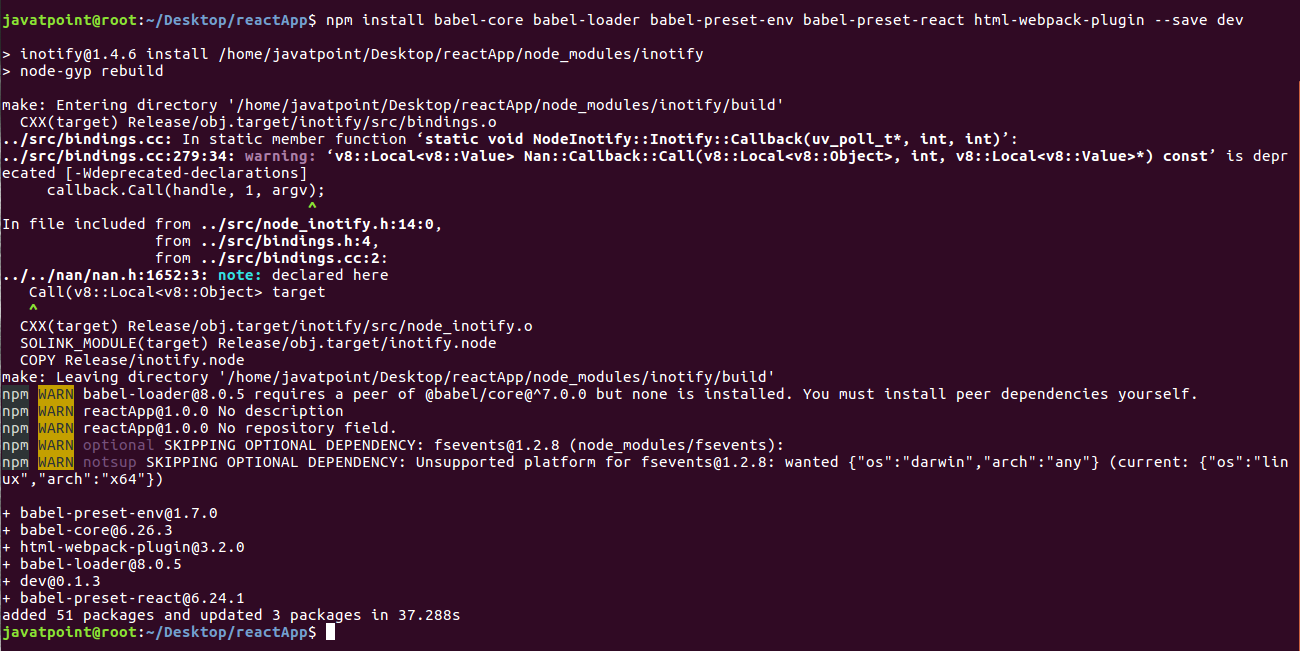
Install Babel
Babel is a JavaScript compiler and transpiler used to convert one source code to others. It compiles React JSX and ES6 to ES5 JavaScript which can be run on all browsers. We need babel-loader for JSX file types, babel-preset-react makes your browser update automatically when any changes occur to your code without losing the current state of the app. ES6 support requires babel-preset-env Babel preset. To install webpack use the following command shown in the below image.
You can also use the above command separately which can be shown as below.
Create Files
To complete the installation process, you need to add the following files in your project folder. These files are index.html, App.js, main.js, webpack.config.js and, .babelrc. You can create these files by manually, or by using the command prompt.
Set Compiler, Loader, and Server for React Application
Configure webpack
You can configure webpack in the webpack.config.js file by adding the following code. It defines your app entry point, build output and the extension which will resolve automatically. It also set the development server to 8080 port. It defines the loaders for processing various file types used within your app and wrap up by adding plugins needed during our development.
webpack.config.json
Now, open the package.json file and delete "test" "echo \" Error: no test specified\" && exit 1" inside "scripts" object, then add the start and build commands instead. It is because we will not perform any testing in this app.
HTML webpack template for index.html
We can add a custom template to generate index.html using the HtmlWeb-packPlugin plugin. This enables us to add a viewport tag to support mobile responsive scaling of our app. It also set the div id = "app" as a root element for your app and adding the index_bundle.js script, which is our bundled app file.
App.jsx and main.js
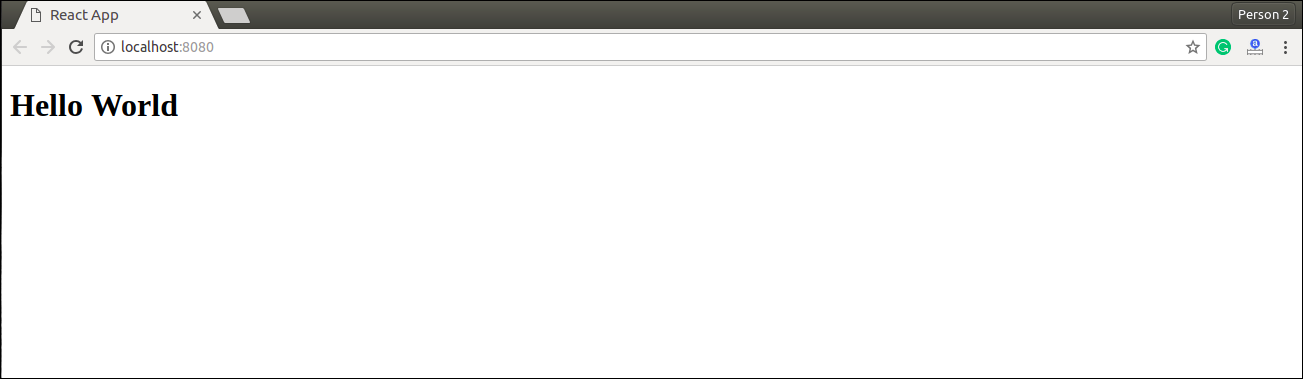
This is the first React component, i.e. app entry point. It will render Hello World.
App.js
Now, import this component and render it to your root App element so that you can see it in the browser.
Main.js
Note: If you want to use something, you need to import it first. To make the component usable in other parts of the app, you need to export it after creation and import it in the file where you want to use it.
Create .babelrc file
Create a file with name .babelrc and copy the following code to it.
.babelrc
Running the Server
After completing the installation process and setting up the app, you can start the server by running the following command.
It will show the port number which we need to open in the browser. After we open it, you will see the following output.
Generate the Bundle
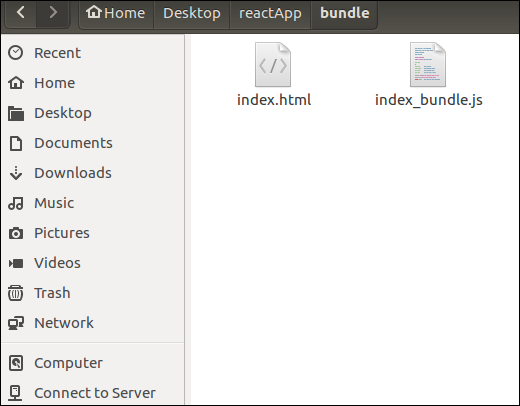
Now, generate the bundle for your app. Bundling is the process of following imported files and merging them into a single file: a "bundle." This bundle can then be included on a webpage to load an entire app at once. To generate this, you need to run the build command in command prompt which can be shown below.
This command will generate the bundle in the current folder(in which your app belongs) and will be shown as like below image.
2. Using the create-react-app command
If you do not want to install react by using webpack and babel, then you can choose create-react-app to install react. The 'create-react-app' is a tool maintained by Facebook itself. This is suitable for beginners without manually having to deal with transpiling tools like webpack and babel. In this section, I will be showing you how to install React using CRA tool.
Install NodeJS and NPM
NodeJS and NPM are the platforms need to develop any ReactJS application. You can install NodeJS and NPM package manager by the link given below.
https://www.javatpoint.com/install-nodejs-on-linux-ubuntu-centos
Install React
You can install React using npm package manager by using the below command. There is no need to worry about the complexity of React installation. The create-react-app npm package will take care of it.
Create a new React project
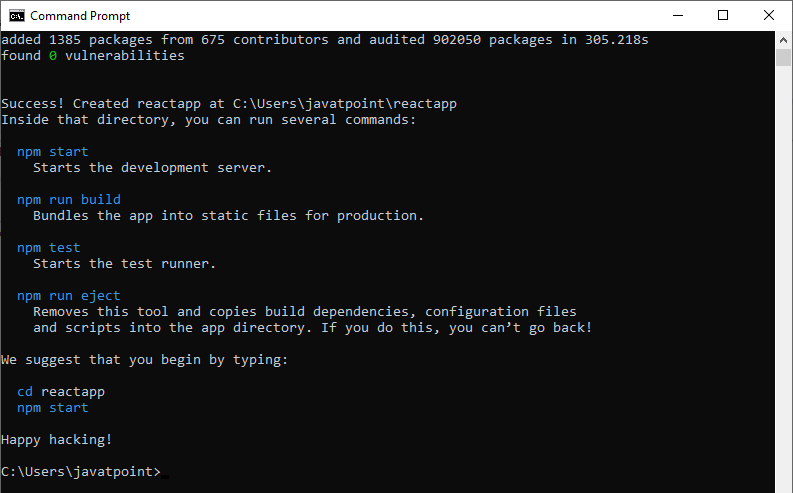
After the installation of React, you can create a new react project using create-react-app command. Here, I choose jtp-reactapp name for my project.
NOTE: You can combine the above two steps in a single command using npx. The npx is a package runner tool that comes with npm 5.2 and above version.
The above command will install the react and create a new project with the name jtp-reactapp. This app contains the following sub-folders and files by default which can be shown in the below image.

Now, to get started, open the src folder and make changes in your desired file. By default, the src folder contain the following files shown in below image.

For example, I will open App.js and make changes in its code which are shown below.
App.js
NOTE: You can also choose your own favorite code editor for editing your project. But in my case, I choose Eclipse. Using the below link, you can download Eclipse for Ubuntu and install.
click Here to download Eclipse for Ubuntu and install
Running the Server
After completing the installation process, you can start the server by running the following command.
It will show the port number which we need to open in the browser. After we open it, you will see the following output.
React create-react-app
Starting a new React project is very complicated, with so many build tools. It uses many dependencies, configuration files, and other requirements such as Babel, Webpack, ESLint before writing a single line of React code. Create React App CLI tool removes all that complexities and makes React app simple. For this, you need to install the package using NPM, and then run a few simple commands to get a new React project.
The create-react-app is an excellent tool for beginners, which allows you to create and run React project very quickly. It does not take any configuration manually. This tool is wrapping all of the required dependencies like Webpack, Babel for React project itself and then you need to focus on writing React code only. This tool sets up the development environment, provides an excellent developer experience, and optimizes the app for production.
Requirements
The Create React App is maintained by Facebook and can works on any platform, for example, macOS, Windows, Linux, etc. To create a React Project using create-react-app, you need to have installed the following things in your system.
- Node version >= 8.10
- NPM version >= 5.6
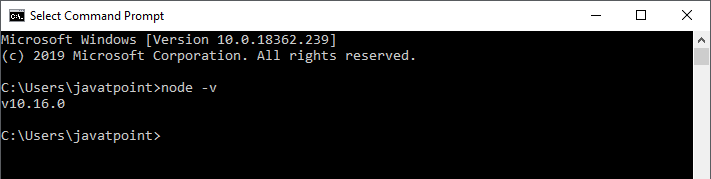
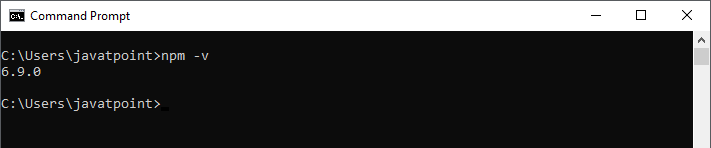
Let us check the current version of Node and NPM in the system.
Run the following command to check the Node version in the command prompt.
Run the following command to check the NPM version in the command prompt.
Installation
Here, we are going to learn how we can install React using CRA tool. For this, we need to follow the steps as given below.
Install React
We can install React using npm package manager by using the following command. There is no need to worry about the complexity of React installation. The create-react-app npm package manager will manage everything, which needed for React project.
Create a new React project
Once the React installation is successful, we can create a new React project using create-react-app command. Here, I choose "reactproject" name for my project.
NOTE: We can combine the above two steps in a single command using npx. The npx is a package runner tool which comes with npm 5.2 and above version.
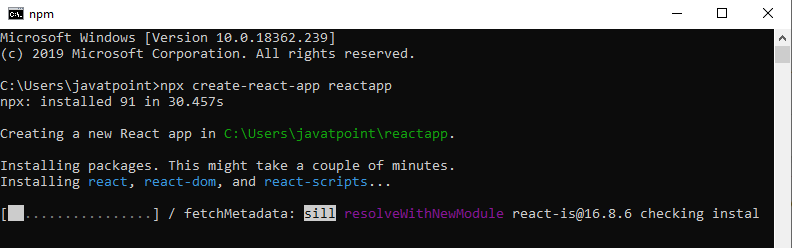
The above command will take some time to install the React and create a new project with the name "reactproject." Now, we can see the terminal as like below.
The above screen tells that the React project is created successfully on our system. Now, we need to start the server so that we can access the application on the browser. Type the following command in the terminal window.
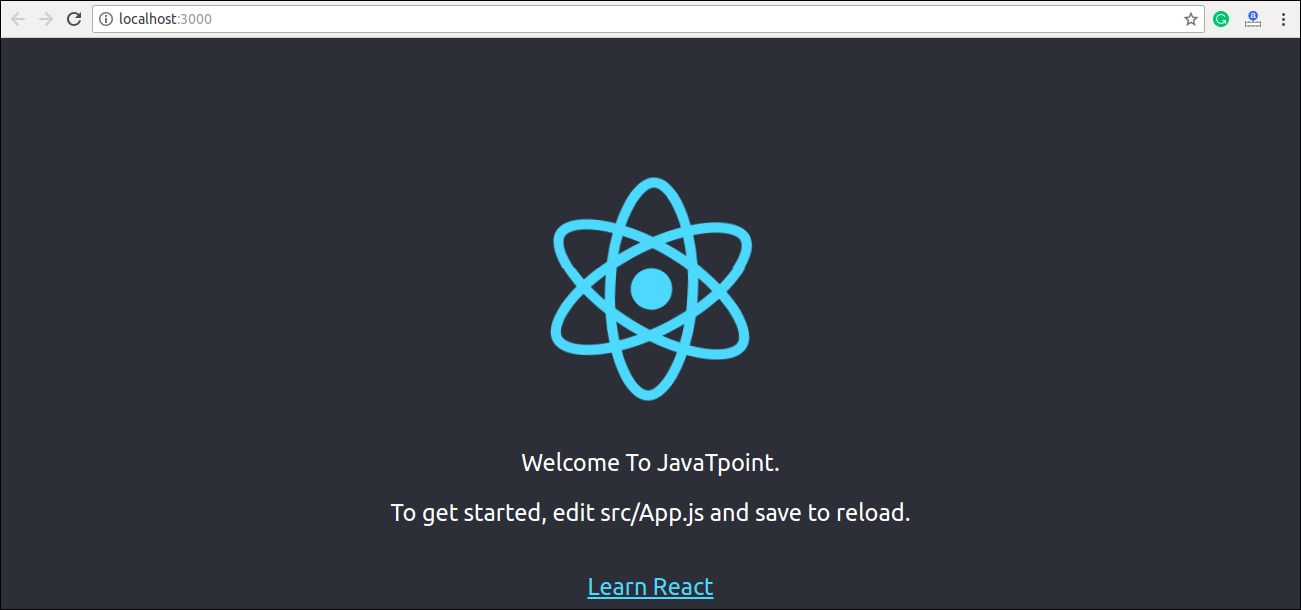
NPM is a package manager which starts the server and access the application at default server http://localhost:3000. Now, we will get the following screen.

Next, open the project on Code editor. Here, I am using Visual Studio Code. Our project's default structure looks like as below image.
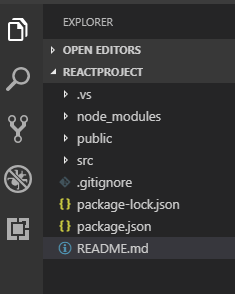
In React application, there are several files and folders in the root directory. Some of them are as follows:
- node_modules: It contains the React library and any other third party libraries needed.
- public: It holds the public assets of the application. It contains the index.html where React will mount the application by default on the <div id="root"></div> element.
- src: It contains the App.css, App.js, App.test.js, index.css, index.js, and serviceWorker.js files. Here, the App.js file always responsible for displaying the output screen in React.
- package-lock.json: It is generated automatically for any operations where npm package modifies either the node_modules tree or package.json. It cannot be published. It will be ignored if it finds any other place rather than the top-level package.
- package.json: It holds various metadata required for the project. It gives information to npm, which allows to identify the project as well as handle the project?s dependencies.
- README.md: It provides the documentation to read about React topics.
React Environment Setup
Now, open the src >> App.js file and make changes which you want to display on the screen. After making desired changes, save the file. As soon as we save the file, Webpack recompiles the code, and the page will refresh automatically, and changes are reflected on the browser screen. Now, we can create as many components as we want, import the newly created component inside the App.js file and that file will be included in our main index.html file after compiling by Webpack.
Next, if we want to make the project for the production mode, type the following command. This command will generate the production build, which is best optimized.
React Features
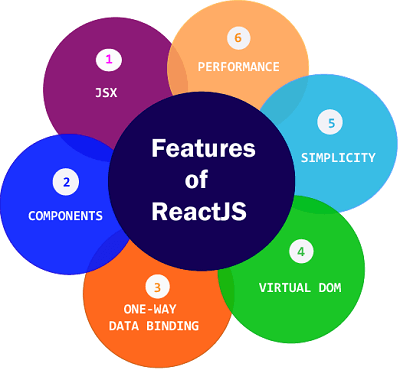
Currently, ReactJS gaining quick popularity as the best JavaScript framework among web developers. It is playing an essential role in the front-end ecosystem. The important features of ReactJS are as following.
- JSX
- Components
- One-way Data Binding
- Virtual DOM
- Simplicity
- Performance
JSX
JSX stands for JavaScript XML. It is a JavaScript syntax extension. Its an XML or HTML like syntax used by ReactJS. This syntax is processed into JavaScript calls of React Framework. It extends the ES6 so that HTML like text can co-exist with JavaScript react code. It is not necessary to use JSX, but it is recommended to use in ReactJS.
Components
ReactJS is all about components. ReactJS application is made up of multiple components, and each component has its own logic and controls. These components can be reusable which help you to maintain the code when working on larger scale projects.
One-way Data Binding
ReactJS is designed in such a manner that follows unidirectional data flow or one-way data binding. The benefits of one-way data binding give you better control throughout the application. If the data flow is in another direction, then it requires additional features. It is because components are supposed to be immutable and the data within them cannot be changed. Flux is a pattern that helps to keep your data unidirectional. This makes the application more flexible that leads to increase efficiency.
Virtual DOM
A virtual DOM object is a representation of the original DOM object. It works like a one-way data binding. Whenever any modifications happen in the web application, the entire UI is re-rendered in virtual DOM representation. Then it checks the difference between the previous DOM representation and new DOM. Once it has done, the real DOM will update only the things that have actually changed. This makes the application faster, and there is no wastage of memory.
Simplicity
ReactJS uses JSX file which makes the application simple and to code as well as understand. We know that ReactJS is a component-based approach which makes the code reusable as your need. This makes it simple to use and learn.
Performance
ReactJS is known to be a great performer. This feature makes it much better than other frameworks out there today. The reason behind this is that it manages a virtual DOM. The DOM is a cross-platform and programming API which deals with HTML, XML or XHTML. The DOM exists entirely in memory. Due to this, when we create a component, we did not write directly to the DOM. Instead, we are writing virtual components that will turn into the DOM leading to smoother and faster performance.
Pros and Cons of ReactJS
Today, ReactJS is the highly used open-source JavaScript Library. It helps in creating impressive web apps that require minimal effort and coding. The main objective of ReactJS is to develop User Interfaces (UI) that improves the speed of the apps. There are important pros and cons of ReactJS given as following:
Advantage of ReactJS
1. Easy to Learn and USe
ReactJS is much easier to learn and use. It comes with a good supply of documentation, tutorials, and training resources. Any developer who comes from a JavaScript background can easily understand and start creating web apps using React in a few days. It is the V(view part) in the MVC (Model-View-Controller) model, and referred to as ?one of the JavaScript frameworks.? It is not fully featured but has the advantage of open-source JavaScript User Interface(UI) library, which helps to execute the task in a better manner.
2. Creating Dynamic Web Applications Becomes Easier
To create a dynamic web application specifically with HTML strings was tricky because it requires a complex coding, but React JS solved that issue and makes it easier. It provides less coding and gives more functionality. It makes use of the JSX(JavaScript Extension), which is a particular syntax letting HTML quotes and HTML tag syntax to render particular subcomponents. It also supports the building of machine-readable codes.
3. Reusable Components
A ReactJS web application is made up of multiple components, and each component has its own logic and controls. These components are responsible for outputting a small, reusable piece of HTML code which can be reused wherever you need them. The reusable code helps to make your apps easier to develop and maintain. These Components can be nested with other components to allow complex applications to be built of simple building blocks. ReactJS uses virtual DOM based mechanism to fill data in HTML DOM. The virtual DOM works fast as it only changes individual DOM elements instead of reloading complete DOM every time.
4. Performance Enhancement
ReactJS improves performance due to virtual DOM. The DOM is a cross-platform and programming API which deals with HTML, XML or XHTML. Most of the developers faced the problem when the DOM was updated, which slowed down the performance of the application. ReactJS solved this problem by introducing virtual DOM. The React Virtual DOM exists entirely in memory and is a representation of the web browser's DOM. Due to this, when we write a React component, we did not write directly to the DOM. Instead, we are writing virtual components that react will turn into the DOM, leading to smoother and faster performance.
5. The Support of Handy Tools
React JS has also gained popularity due to the presence of a handy set of tools. These tools make the task of the developers understandable and easier. The React Developer Tools have been designed as Chrome and Firefox dev extension and allow you to inspect the React component hierarchies in the virtual DOM. It also allows you to select particular components and examine and edit their current props and state.
6. Known to be SEO Friendly
Traditional JavaScript frameworks have an issue in dealing with SEO. The search engines generally having trouble in reading JavaScript-heavy applications. Many web developers have often complained about this problem. ReactJS overcomes this problem that helps developers to be easily navigated on various search engines. It is because React.js applications can run on the server, and the virtual DOM will be rendering and returning to the browser as a regular web page.
7. The Benefit of Having JavaScript Library
Today, ReactJS is choosing by most of the web developers. It is because it is offering a very rich JavaScript library. The JavaScript library provides more flexibility to the web developers to choose the way they want.
8. Scope for Testing the Codes
ReactJS applications are extremely easy to test. It offers a scope where the developer can test and debug their codes with the help of native tools.
Disadvantage of ReactJS
1. The high pace of development
The high pace of development has an advantage and disadvantage both. In case of disadvantage, since the environment continually changes so fast, some of the developers not feeling comfortable to relearn the new ways of doing things regularly. It may be hard for them to adopt all these changes with all the continuous updates. They need to be always updated with their skills and learn new ways of doing things.
2. Poor Documentation
It is another cons which are common for constantly updating technologies. React technologies updating and accelerating so fast that there is no time to make proper documentation. To overcome this, developers write instructions on their own with the evolving of new releases and tools in their current projects.
3. View Part
ReactJS Covers only the UI Layers of the app and nothing else. So you still need to choose some other technologies to get a complete tooling set for development in the project.
4. JSX as a barrier
ReactJS uses JSX. It's a syntax extension that allows HTML with JavaScript mixed together. This approach has its own benefits, but some members of the development community consider JSX as a barrier, especially for new developers. Developers complain about its complexity in the learning curve.
React vs. Vue
React and Vue is the two most popular JavaScript libraries which are used to build thousands of websites today. Both React and Vue are very powerful frameworks with their own set of pros and cons. Which one you have to pick, depends on the business needs and use cases.
Both React and Vue have a lot of common things like the component-based architecture, usage of virtual DOM, usage of props, chrome Dev tools for debugging, and many more. But, both have some significant differences, which are given below.

| React | Vue | |
|---|---|---|
| Definition | React is a declarative, efficient, flexible, open-source JavaScript library for building reusable UI components. | Vue is an open-source JavaScript library for building reusable user interfaces and single-page applications. |
| History | It was created by Jordan Walke, a software engineer at Facebook. It was initially developed and maintained by Facebook and later used in its products like WhatsApp & Instagram. Facebook developed React in 2011 for the newsfeed section, but it was released to the public on May 2013. | Vue was created by Evan You, a former employee of Google worked on many Angular projects. He wanted to make a better version of Angular, just extracting the part which he liked about Angular and making it lighter. The first release of Vue was introduced in February 2014. |
| Learning Curve | React is not a complete framework, and the more advanced framework must be looked for the use of third-party libraries. It makes the learning of the core framework not so easy. It adds some complexity to the learning curve as it differs based on the choices you take with additional functionality. | Vue provides higher customizability, which makes it easier to learn than Angular or React. Vue shares some concepts with Angular and React in their functionality. Hence, the transition to Vue from Angular and React is an easy option. Also, the official documentation is well written and covers everything the developer needs to build a Vue app. |
| Preferred Language | JavaScript/JavaScript XML | HTML/JavaScript |
| Size | The size of the React library is 100 kilobytes (approx.). | The size of the Vue library is 60 kilobytes (approx.). |
| Performance | Its performance is slow as compared to Vue. | Its performance is fast as compared to React. |
| Flexibility | React provides great flexibility to support third-party libraries. | Vue provides limited flexibility as compared to React. |
| Coding Style | React uses JSX for writing JavaScript Expression instead of regular JavaScript. JSX is similar to HTML code within the JavaScript expressions. React takes everything as Component, and each component has its own lifecycle methods. | Vue coding style is little similar to Angular. It separates HTML, JS, and CSS as like web developers have been used to the web development scenario for years. But, it also allows using JSX if you prefer. Vue's take of the component lifecycle more intuitive than React's. |
| Data Binding | React supports one-way data binding. The one-way data binding refers to a single source of truth. React flows in a single direction, and only the model can change the app's state. | Vue supports both one-way and two-way data binding. The two-way data binding is a mechanism where UI fields are bound to model dynamically. If the UI components change, model data is also changed accordingly. |
| Tooling | React has great tooling support. It uses third-party CLI tool (create-react-app), which helps to create new apps and components in React Project. It has excellent support for the major IDEs. | Vue provides limited tooling support as compared to React. It has a Vue CLI tool, which is similar to the create-react-app tool. It gives supports for major IDEs but not as good as React. |
| Current Version | React 16.8.6 on March 27, 2019 | Vue 2.6.10 on March 20, 2019. |
| Long Term Support | It is suitable for long term supports. | It is not suitable for long term support. |
Loop Array in React JS | React Foreach Loop Example
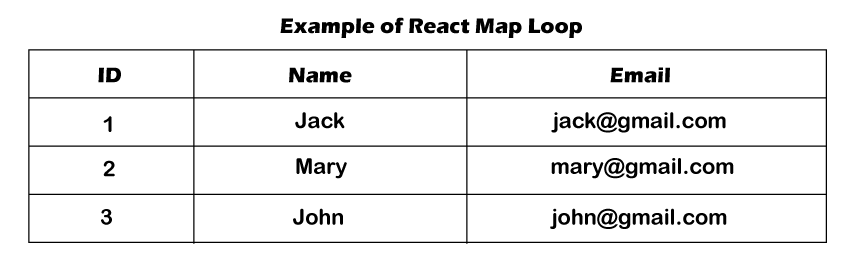
In this section, we are going to use an array to explain the reach native loop in the render. For this, we have described a react loop array example in the render. When we want to build any web application, it is very important to have the knowledge of handling an array of data. In this example, we will see the use of loop in react js. In our given example, we are going to use for loop in react js. To perform this, we have to follow some steps.
In this section, we will use react app. When we require a map, foreach loop, and for loop in react, we can look at the following example to learn the use of loop array n react js. In array, we always want for loop and foreach loop. When we want to loop our array in reach, it will require a map to do this. So we are going to explain the example of a map in react native. A new array is created by the map() method. In the calling array, it provides the result of calling a function on each and every element. The looping process can be simplified by this. When we use the map, we don't require the use of forEach function and for loop. Map, forEach loop, for loop has many differences. Instead of overwriting the existing data, the map function uses the data and creates a new array. Due to all the features and the simplicity of the map function, React docs strongly encourage us to use the map function.
We will provide two examples in react app to explain this easy concept. In the first example, we are going to describe the react loop, which has a single-dimensional array. In the second example, we will describe a loop that has a multidimensional array. Both examples are as follows:
Example 1:
rc/App.js
Example 2:
src/App.js
After running this example, we will get the following preview:
React Axios Delete Request Example
In this section, we are going to see the delete request of react axios. We will use the react js to learn the http delete request. Suppose we want to use axios react to send the http delete request. In this case, we have to follow the step-by-step process to send and delete requests in react, which will be described in the given example.
React is a JavaScript library. It can build the interface. Sometimes the data need to be revalidated by the reactive JavaScript frameworks such as Angular and React when a page renders. After this, many requests will be lead between various external services and the front end and back end. Using the axios, we can keep things D.R.Y with default, interceptors, and instances. The complex applications use axios, which are frequently making API requests. Different APIs can be created the separate instances. In order to handle the global error, we can set interceptors. For common headers, the default can be unset or set. A little more functionality is provided by axios. The functionality will be useful for those applications that use React.
Axios is a kind of nmp package which is used to send the http request from our application. The api of "jsonplaceholder" uses the axios package to delete the data, and we will use this api in our example. When we use the web to access resources, this process is not instantaneous. The promise API is contained by JavaScript. When we want to perform asynchronous tasks, these promises will be useful. Asynchronous tasks are very useful to perform things in sequence. That means it does not change any things from happening.
Example:
After executing the above code, we will see the following output:

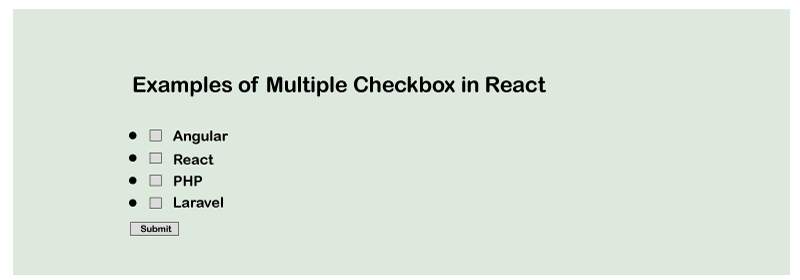
React Multiple Checkbox
In this section, we are going to learn the use of multiple checkboxes in React. We will see the use of ReachJS to get all checked values. In our below example, we will show that how we can get value from react multiple checkboxes.
Sometimes we have to set multiple checkboxes on the basis of user requirements. We can set the options to select fruits, and users can select them according to their choices. If users want to select more than one option or multiple options from the list, they can also do this. In this case, we are required to put multiple checkboxes in ReactJS. For this, the following example will help us to understand the use of multiple checkboxes in react.
In our below example, we are going to take an array of one category, which will contain React, Laravel, PHP, Angular, etc. We will show dynamic multiple checkboxes by using the map loop. We will make a variable named "checkedItems" to store the information of the checkbox, which is selected by the user. When the form is submitted by the user, they will get the values of all selected checkboxes. The example code to do this is as follows:
Example Code:
When we execute the above code, we will get the following output:
No comments:
Post a Comment